Basket
Want free delivery? Spend £25 more.
Congratulations!
You've qualified for free delivery!
Skip to content

How to Do Nail Art Flowers At Home (Beginner-Friendly Version!)

Written by: Merilin Notton

|

|

Time to read 10 min

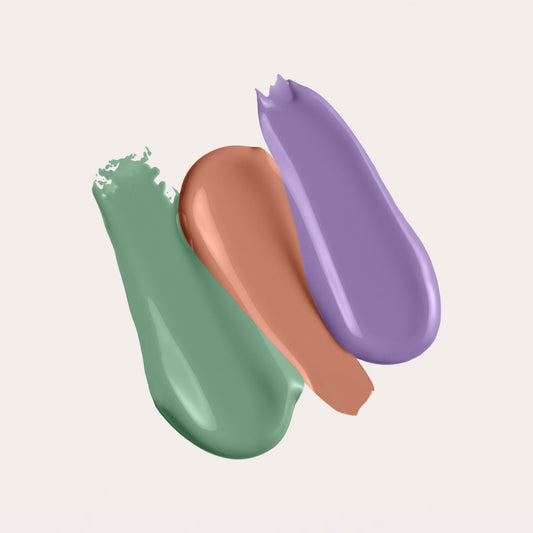
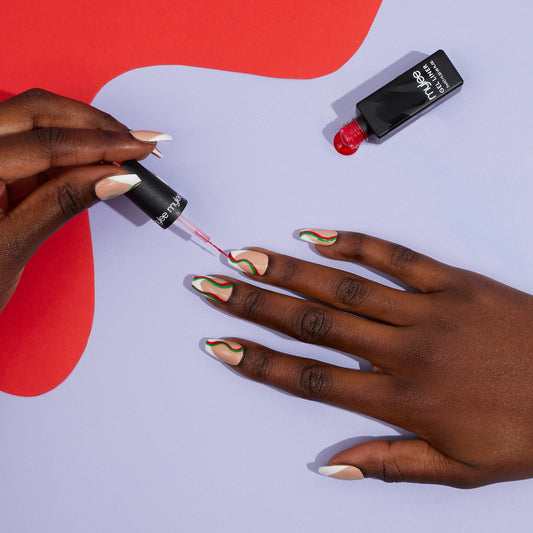
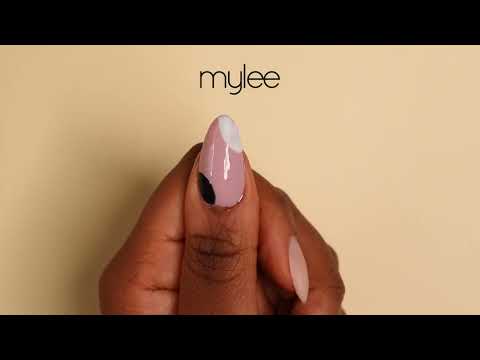
A floral mani has to be up there as one of the most popular (and one of our most favourite) nail art designs. But how do you draw the perfect little nail art flowers when you're no Picasso? Well, it's actually very easy.


Whether flowers are on the menu for your next summer mani, or you just want to add some floral flair to your everyday look, we've got you covered with this beginner-friendly guide on how to do nail art flowers at home.


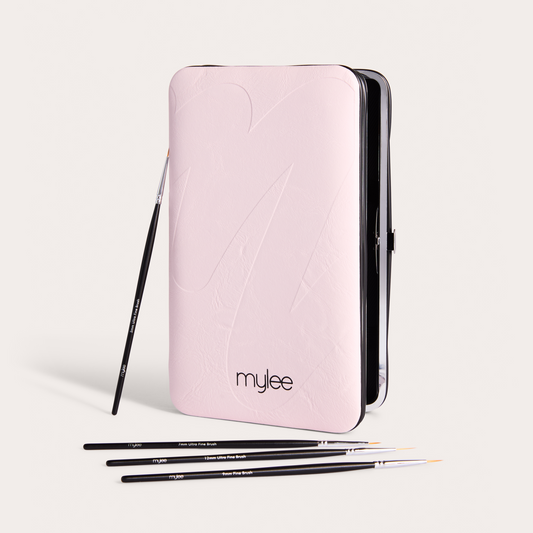
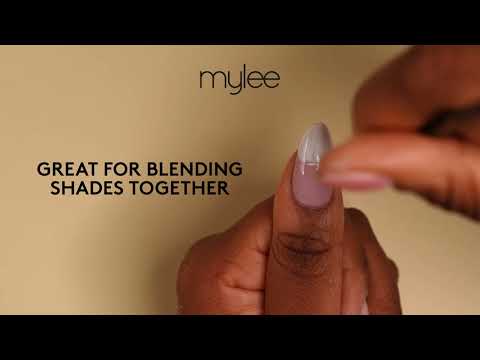
There are a couple of different ways you can create floral nail art, so it really comes down to your preferred method and the tools you have on hand. But don't worry, we'll cover them all so you can choose which one works best for you.

What are the Different Ways to Create Nail Art Flowers?

  1. Using nail art stickers/decals

  2. Using a dotting tool

  3. Using a nail art brush

Like we said, there are a couple of different ways you can create nail art flowers, and each will give you slightly different results.


If you're a complete and total beginner, we recommend having fun experimenting with all of these methods until you find one that feels the most comfortable and produces the best results for you.


Ready to get started? Let's start creating some bloomin' lovely nail art flowers!

Method 1: Using Floral Nail Art Stickers

We'll start with the easiest method on the list – using floral nail art stickers or decals.


Nail art stickers are like a little cheat code for creating beautiful nail art. You don't have to be an artist or have steady hands to achieve stunning results, and it can save you a bit of time, too.


You can also mix and match different sticker designs to create your own unique flower arrangement, like combining dainty daisies with leaf nail art stickers for a spring-inspired look (we love using our Golden Leaves Nail Art Stickers for this).

How To

To use floral nail art stickers, follow these simple steps:


Step 1) Prep your nails for gel polish. If this is your first gel nails rodeo, you can follow along with this tutorial by the wonderful @jxckhxrperart.

Step 2) Apply a layer of Base Coat to your prepped nails and cure under a Mylee LED Lamp for 60 seconds.


Step 3) Now, you can choose to either apply the stickers to your clear base, or you can go in with a gel colour of your choice. If you're going for a more minimalist look, we recommend using a sheer or nude colour as the base. If applying a gel nail colour, make sure to cure again.


Step 4) Use a pair of tweezers to peel off the stickers from the back sheet. Be gentle, as these stickers are delicate!


Step 5) Carefully place the sticker on your nail, making sure to smooth out any air bubbles. Use a cuticle stick or your finger to press down on the edges for a secure fit.


Step 6) Apply a layer of No Wipe Top Coat over your nails and cure under the LED lamp for 60 seconds.


And it's as simple as that!

Method 2: Creating Nail Flowers With a Dotting Tool

A dotting tool might just be the most used way to create a floral nail art look. It has a small metal ball on one end and a larger one on the other, which is perfect for creating intricate designs.


The great thing about using this nifty tool is it allows you to easily control the size of your dots, making it perfect for creating any size of flower on your nails.


The tool you use will make all the difference in the finish of your flower design. A poorly made dotting tool will create uneven and inconsistent dots, while a professional-quality one will create perfect circles every time.

Our Dotting Tool is a super versatile tool that is perfect for creating floral nail art designs. It features a comfortable grip and two different-sized dotting tools, making it easy to create various sizes of flowers on your nails.


It can be used with gel polish or regular nail polish, giving you endless possibilities for your designs.

How To

To perfect your flower nail art look using a dotting tool, you can follow this super handy tutorial by @gelsbyflorence!

@myleebeautyofficial Keeping up manis with @haileybieber 🌸 📹 - @gelsbyflorence using Light Pink Builder Gel, Break The Ice, Candy Girl & Crown Jewels 💅 #mylee #lovemylee #myleebeauty #myleenails #gelnails #floralnails #haileybieber #haileybiebernails ♬ original sound - Myleebeauty

Steps from the video:


Step 1) After prepping your nails and applying your chosen base colour, dip the larger end of the dotting tool into a contrasting nail polish colour. Florence has used Break The Ice for her look.


Step 2) Dot the polish onto your nail in a circle shape. The size of the circle will vary depending on how many petals you want your flower to have. For this look, Florence has gone for 6 petals (or 6 dots).


Step 3) Swipe each dot inwards to the centre of the circle you've created.


Step 4) Flash cure under the LED Lamp for 30 seconds.


Step 5) To create the pistil (or centre) of the flower, dip the smaller end of your dotting tool in a different coloured polish and add a small dot in the middle of your flower. This look uses Candy Girl, a beautiful light candy pink shade.


Step 6) Flash cure again.


Step 7) This step is optional, but Florence has added little gems to the middle of each flower for some extra sparkle. Use a small dot of clear polish to secure the gems and then flash cure for a final time.


Step 8) Finish off with a Top Coat to seal in your design and add shine. Cure for a final 60 seconds.

Method 3: Creating a Floral Nail Look With a Nail Art Brush

A nail art brush does require a bit more skill and patience, but the results can be stunning. You need a bit of a steadier hand than you do with a dotting tool, but with some practice, you can achieve intricate and detailed floral designs.


You also have a bit more versatility with nail brushes, and you can use different brush thicknesses for different effects.


You can use regular gel polish for this method, but we actually recommend using a solid gel polish, like our Créme CaraGel line.


Solid gel polish gives you more artistic control because of the thicker consistency, and it's easier to work with when creating detailed designs. It still gives you the same salon-quality results as regular gel polish, though!

How To

To showcase the different ways you can use nail brushes for floral designs, follow along with @simlynail's fab tutorial below!

It's important to remember that you must flash-cure your flower design before moving on to the next step. This sets your design in place and prevents smudging or mixing with other uncured gel polish.

Our Favourite Flower Nail Art Design Ideas

Now that you've got the lowdown on the different ways you can draw flowers on your nails, it's time to get inspired!


We've dished out some of our favourite flower nail art designs that you can easily recreate at home using our gel polish and nail art tools.

Floral Pink French Manicure

A French mani combined with a delicate floral design is the perfect way to combine these two classic nail trends.


We especially love this look for spring, with the pretty lavender French tips complementing the delicate white flowers perfectly. But you could even switch up the colour scheme to match any season, like vampy nail colours for autumn or cool-toned colours for winter.

Black Flower Nail Art

Who said that flowers have to be bright and colourful? This black and white floral nail art is sophisticated and chic, perfect for any occasion. The muted tones make it easy to match with any outfit, and the intricate design adds a touch of elegance.


The dotting tool method works well for this design, allowing you to create precise and delicate flowers.

Neon Floral Nails

And at the complete opposite end of the spectrum, we have these bold and vibrant neon floral nails!


These are perfect for those hot summer days when you want to make a statement with your mani, or even for flaunting at a festival. The contrasting neon colours and early 2000s vibe make this nail art a fun and playful choice.

Matte Pastel Floral Patterns

Pastel colours are always a popular choice for nail art, and when combined with delicate floral patterns, the result is simply stunning.


Here, we've rolled together intricate flowers and chunky French tips using soft pastel shades for a whimsical spring and summer look. The matte finish adds something a bit different and modern to this classic design, but you could definitely opt for a glossy top coat if that's more your thing.

Strawberry & Flower Nail Art

If you're looking for a super sweet nail look, this design will satisfy your craving. These strawberry and flower nails are fun, cute, and perfect for the warmer months.


Nail art brushes and dotting tools are essential for creating the little white flowers, as well as the strawberries and chequerboard pattern.

Nude Floral Nails

Floral manicures with a nude base are the perfect look to finish our list. The pastel colours and delicate flowers create a soft and subtle look, and it's easy to tailor the look by choosing the best nude polish for your skin tone.

The Roundup: Nail Your Next Floral Mani With Mylee

From dainty designs to striking colours, there are endless ways you can have fun with floral nail art – and we have the perfect tools to help you achieve it.


With our nail art tools and salon-quality polishes, you'll be able to create beautiful floral nails that last up to 3 weeks without chipping, giving you longer to enjoy your gorgeous mani.


Shop our essentials for creating flower nail art below, or head over to the rest of our blog for more nail inspiration and tips!

FAQs

How Do I Create a Simple Nail Art Flower?

For a simple flower, place 5 small dots onto your nail in a circle using a dotting tool. Then, gently swipe the dotting tool from each dot towards the centre to create petals. With a different colour polish, add a single dot to the middle for the flower's centre. Flash cure your design and seal with a top coat.

How Do You Use Dried Flowers for Nail Art?

Dried flowers can be encapsulated using our Clear Builder Gel. After curing a base coat or your chosen gel colour, place a small dot of Builder Gel onto your nail and use tweezers to gently place the flower on top.


Flash cure for 30 seconds under our Convex LED Lamp. Then very carefully encapsulate the flower with more Builder Gel by floating it over the top. Fully cure for 60 seconds.

How Do You Do Sunflower Nail Art?

To create sunflower nail art, start by applying a base coat and cure. Use a nail art brush dipped in yellow gel polish to create the petals of the sunflower. These should be long and pointed, radiating out from the centre of the nail. Flash cure for 30 seconds.


Use another nail art brush or the thicker end of the Dotting Tool dipped in a black or dark brown gel polish to create the centre of the flower. This can be a small dot or multiple dots depending on the size of the sunflower you want to create. Flash cure for 30 seconds.


Apply a layer of No Wipe Top Coat over your entire nail and cure for 60 seconds.

Can You Use a Toothpick to Do Nail Art?

You can use a toothpick to do nail art if you don't have any brushes or a dotting tool on hand.


However, for the most precise and professional-looking results, we recommend investing in proper nail art tools. They are designed specifically for creating intricate designs and will make the process much easier!

Merilin Notton

Merilin Notton

As the Head of Brand at Mylee, Merilin is a seasoned beauty industry professional with a strong passion for nail art. 

With a background as a licensed beautician and a track record of shaping and elevating beauty brands, Merilin is dedicated to empowering individuals to express themselves through nail art, making them a driving force behind Mylee's success in the beauty industry.

🔗

Mylee Recommends...

Recently viewed

Recently viewed

15% OFF

Get exclusive deals and be the first to know about sales and special offers.

You can unsubscribe anytime!

Free UK Standard Delivery

On Orders Over £25!

Apple Pay

Available on all purchases

Buy now, pay later

Klarna Available

Add Fix 'N' Flash Gel to secure

Shop Fix 'N' Flash Gel to cure on your tips

Shape and remove Fix 'N' Flash

Shop The Shortie to customise your tips and make removal easier

FREE GIFT! 4 Selected Polishes (Worth £27.99)

Bag 4 FREE polishes (The Cherry Cola Kit, worth £27.99) when you buy any of our Full Works Kits. Offer valid for a limited time only.

Add Brush It Off to cleanse ‘em

Shop Brush It Off to cleanse your brushes

Go extend your brushes lives

Shop our brushes here