The easiest way to create nail art at home is by using a nail art kit. It’ll come with all the nail tools you need to get started.
How to Nail Art Kit

Pro tip:


The easiest way to create nail art at home is by using a nail art kit. It’ll come with all the nail tools you need to get started.






STEP 1. PREP & PRIME
File your nails to shape and use a Mylee Buffing Block* to gently remove shine from the nail plate. This creates the ideal surface for better adhesion. Push back cuticles for a clean edge, then cleanse nails with Mylee 2-in-1 Nail Prep & Wipe* on a Lint Free Wipe* to remove oils and residue. If you’re prone to lifting, apply the Mylee Dehydrator* followed by the Mylee Acid-Free Primer*.
STEP 2. BASE COAT
Apply a thin layer of your chosen Mylee Base Coat* and cure for 60 seconds using a Mylee LED Lamp*.
STEP 3. COLOUR & NAIL ART
Brush on your favourite Mylee Gel Polish* shade and cure for 60 seconds. Build up in thin layers, curing each coat for a smooth, even base for your design. Apply a Mylee No-Wipe Top Coat* - glossy or matte - and cure for 60 seconds.
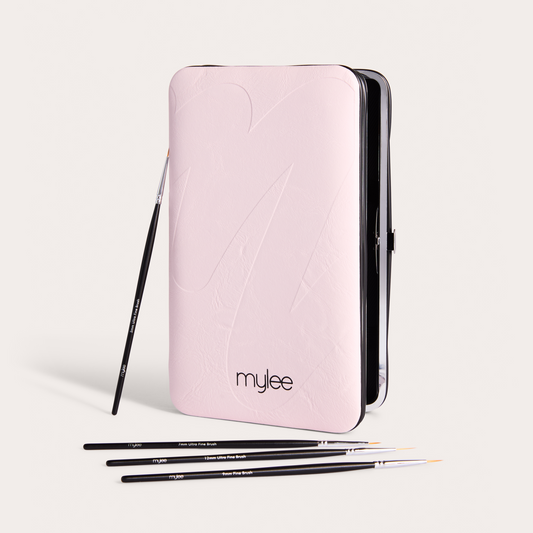
Using a Liner Brush* and your chosen Mylee Gel Polish*, paint your design. Hold your finger over a Glitter Catcher* and gently pour over the 3D Powder*, making sure the design is fully covered. Tap away any excess powder, then cure to set your design in place.
STEP 4. FINISH
Gently brush away the remaining loose powder using the Mylee Duster Brush*. If needed, wipe around the nail using a Mylee 2-in-1 Nail Prep & Wipe* on a Lint-Free Wipe* to remove any residue. Apply Mylee Nail & Cuticle Oil*, moisturise, and enjoy your textured, salon-quality nail art.
*Products sold separately.

STEP 1. PREP & PRIME
File your nails to shape and use a Mylee Buffing Block* to gently remove shine from the nail plate. This creates the ideal surface for better adhesion. Push back cuticles for a clean edge, then cleanse nails with Mylee 2-in-1 Nail Prep & Wipe* on a Lint Free Wipe* to remove oils and residue. If you’re prone to lifting, apply the Mylee Dehydrator* followed by the Mylee Acid-Free Primer*.
STEP 2. BASE COAT
Apply a thin layer of your chosen Mylee Base Coat* and cure for 60 seconds using a Mylee LED Lamp*.
STEP 3. COLOUR & NAIL ART
Brush on your favourite Mylee Gel Polish* shade and cure for 60 seconds. Build up in thin layers, curing each coat for a smooth, even base for your design.
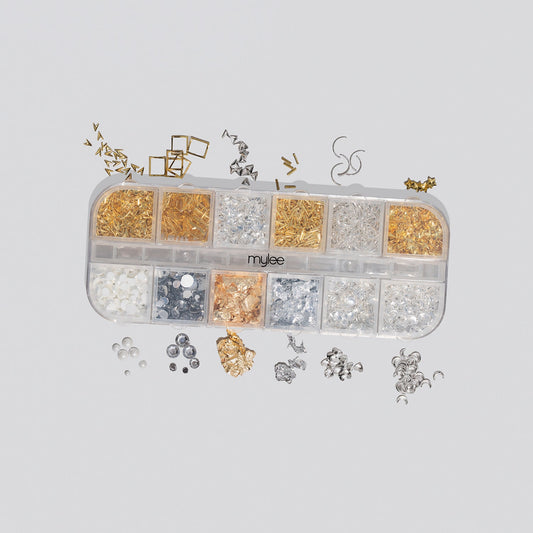
Pick up the Gold Leaf or Silver Leaf using a Dotting Tool* or Tweezers* and place onto the nail. Apply a layer of Mylee Clear 5-In-1 Builder Gel* over the top to encapsulate and cure for 60 seconds.
Use the Curving Tool* to shape your decorations to fit the nail. To apply gems, add a small dot of Mylee Clear 5-In-1 Builder Gel*, place your gems, then cure to secure.
STEP 4. FINISH
Go over your design with another layer of Mylee Clear 5-In-1 Builder Gel* to fully encapsulate and cure for 60 seconds. Finish with Mylee Nail & Cuticle Oil*, moisturise, and enjoy your statement, salon-quality set.
*Products sold separately.

STEP 1. PREP & PRIME
File your nails to shape and use a Mylee Buffing Block* to gently remove shine from the nail plate. This creates the ideal surface for better adhesion. Push back cuticles for a clean edge, then cleanse nails with Mylee 2-in-1 Nail Prep & Wipe* on a Lint Free Wipe* to remove oils and residue. If you’re prone to lifting, apply the Mylee Dehydrator* followed by the Mylee Acid-Free Primer*.
STEP 2. BASE COAT
Apply a thin layer of your chosen Mylee Base Coat* and cure for 60 seconds using a Mylee LED lamp*.
STEP 3. COLOUR & NAIL ART
Apply your chosen Mylee Gel Polish* shade and cure for 60 seconds. Build up in thin layers, curing each coat for a smooth, even base for your design.
Now it’s time to get creative by mixing shades on the Mixing Palette using the Dotting Tool or Nail Art Brush, then paint onto the nail to create swirls, patterns or French tips. Cure to set your design.
Pick up Gold Leaf using a Dotting Tool and place onto the nail. Apply a layer of Mylee 5-In-1 Clear Builder Gel to encapsulate and cure.
To apply Assorted Gems and Pearls, add a small dot of Mylee Clear 5-In-1 Builder Gel, place your decoration, then cure to secure. Finish by going over the design with more Mylee 5-In-1 Clear Builder Gel to fully encapsulate and cure again.
STEP 4. TOP COAT & FINISH
Seal the deal with a Mylee Top Coat* and cure for 60 seconds. If using a regular Top Coat, remove the tacky layer with a Mylee 2-in-1 Nail Prep & Wipe* on a Lint-Free Wipe*. Alternatively, use a Mylee No-Wipe Top Coat* and skip this step. Wash your hands, apply Mylee Nail & Cuticle Oil*, moisturise, and enjoy your mani.
*Products sold separately.


